Upon hearing information about the first tasks we have to do, I was quite excited about the prospect of modelling my own face, I feel it will be an exciting challenge to see if i can model my own face in detail within a 6 week period. I feel it will really be a good test of my skill and experience because I have not always felt the most confident in 3d Studio Max.
Also, we have been assigned to go to the Museum of Power in Langford in groups to choose one item and model and be able to demonstrate it on a computer screen for the museum. Out of the two tasks I prefer ther sound of the first one purely because I think i will enjoy it more than modelling a train for example. So in Week 3 we will in our groups go and visit the Museum but for now I am going to start the assignment on creating my face/head in 3d.
Topology
Creating whats known as the topology for my face, I need to take two pictures of my face, one straight in front and one on the side of my face. So I borrowed a Digital SLR camera from the library (A Nikon D80) to make sure the photos were good quality. I then visited the Gym when it wasn't being used to capture my photo, I chose the Gym as the light sources were pretty good and i knew it had a plain white background I would be able to stand in front of I used the self timer function on the camera as I had nobody with me to take my photos and rested the camera on a stand, I took around about 12-15 photos before i was happy to go and hand the camera back in.
So here are the two best photos I ended up with:
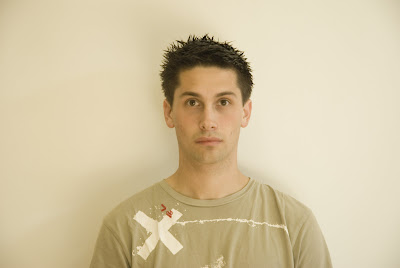
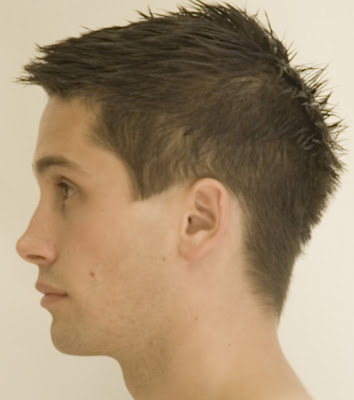
So after some zooming in and cropping in Photoshop and placing the photos side by side, thankfully the nose, eyes and mouth all lined up pretty evenly. Some fiddling had to be done to get the side shot exaclty right but I didn't have to do a thing to edit the front view.
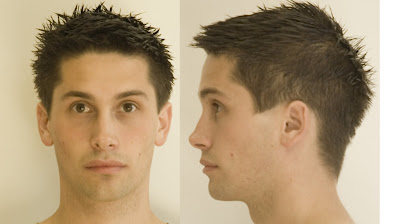
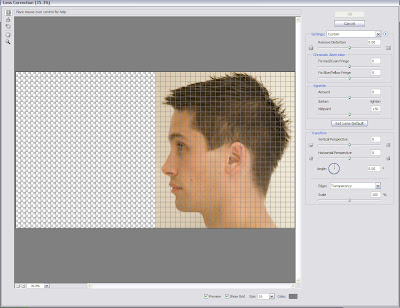
The side view just needed very slight rotation and this was performed in photoshop using the Lens Correction tool option you can see on the menus below:
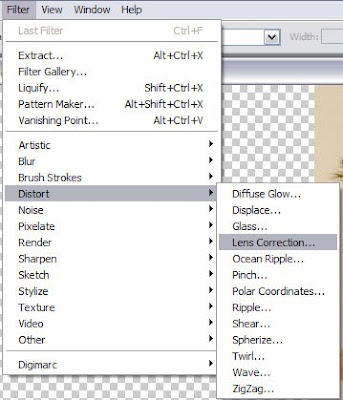
Using this option brings you to a new window where you can adjust the size, rotation, perspective using a grid to align everything perfectly, and using the front shot, you can then adjust the side shot to match the same eye level, nose level and mouth level:
It is advisable in Photoshop once adjusting both images in lens distortion to place the images together and adjusting the opactiy so you can see that things are the same level and/or drawing straight lines to check that it all matches:
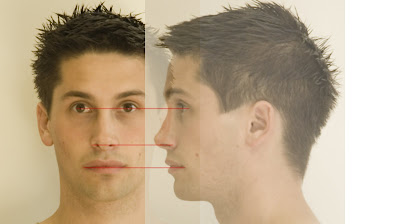
Then all you need to do is pull the layer with the side of the face so it is not laying over the top of the other image and save at this point.

You now at this point have a face that is level and going to casue fewer problems than if you had just jumped straight in and thrown any old pictures into 3d max. The next step is drawing the topology reference lines that will help guide our vertex points in 3d max to create our face, so the more work you put into the preperation, the more realistic this will turn out for you.
With drawing your topology, you need to think about the muscles and the contours of the face and skeletal features to work out which way the face should naturally flow. I used Google Images to source these images to guide me before I drew anything on my face in photoshop:


And these pictures give you a rough clue as to where to start, As you can see the bottom of the jaw has a very disinct line to follow and if you just mark the line of the jaw with a thick line (any colour and probably best to start off on a new layer to make it less complicated for rubbing things out) this will start you off. The next obvious place to mark would be along the left eyebrow (on the front view, only draw on the left hand side, the reason for this is because when we get the topology into 3d Max we can just use symmetry to fill out the rest), follow the rest of the main contours of the face with a fairly thick line such as down the nose, across the forehead, etc until you end up with something similar to below:
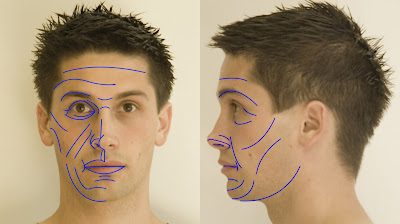 So as you can see the main contour lines are drawn out here in Photoshop. Personally I preferred to use the pen tool because you can get a smoother result, but you can get a good result with the brush tool if you're steady with the mouse or you have a graphics tablet. As you can see, the not so obvious lines you would have to fill in are the two under the eye and the direction of the lines on the cheekbones sometimes confuses people, but this is my effort.
No comments:
Post a Comment